
Click here to download this page in PDF Format
First things first…
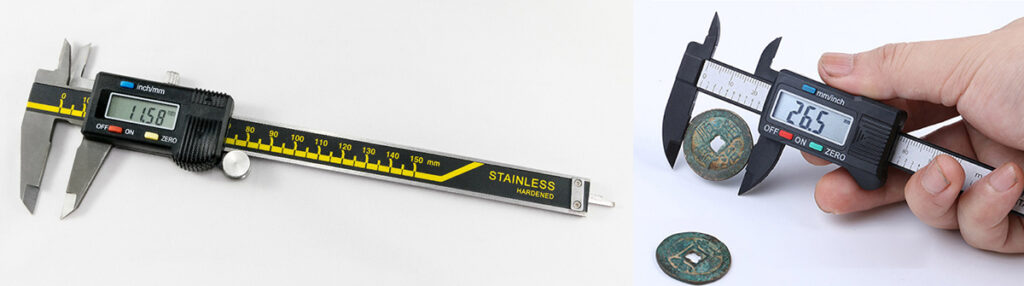
Whether you are new to 3D printing or just trying to accurately describe a part or item on the OGR Forum, a MUST HAVE TOOL is a set of digital calipers that allows you to accurately measure three dimensional parts either inches or millimeters. They are inexpensive and very helpful around the house and shop for measuring both outside and inside dimensions. HERE is a selection of inexpensive digital calipers.
What is 3D Printing?
In its simplest terms, 3D printing is the process of making a 3-dimensional object using a special kind of printer. 3D printing is a process where you add material in layers to build a 3 dimensional object.
The two most common types of 3D printers that you will see in use are:
Filament printing: This is a process where spools of raw plastic material are automatically fed like a wire feed into the printer. The printer melts the material and injects it on to the plane of the printer where the object is being formed. The filament is added in very thin multiple layers until the object is completely formed. HERE is an example of filament printing.
Resin printing: This is a process where a liquid resin is poured into a holding dish on the plane of the printer. The bottom of the vat uses a thin sheet of mylar material through which UV light can penetrate the liquid resin, which is UV sensitive. When struck by a computer-controlled UV laser, the resin will change from a liquid to solid state. Basically, the laser “draws” the outlines of the print onto the resin layer and hardens the parts that it touches. The parts that are not touched by the laser will remain liquid. The resin is added in very thin multiple layers to the underside of an aluminum build platform, until the object is completely formed. The object prints in an upside-down fashion. HERE is an example of resin printing.
Each process has advantages in terms of costs, ease of use and degree of detail. A very general comparison would be that Filament printers are more affordable and easier to use, while Resin printers can provide a higher degree of detail in the finished piece.
How 3D Printing Works
NOTE: If getting involved in Computer-Aided Design (CAD) is a bit too technical for you, there are many items available right here in the OGR 3D Catalog that are complete projects, ready to download and print.
STEP 1 – Create a Computer-Aided Design (CAD) File
The first step to creating a 3D printed object is creating a virtual design with computer software. However, before you buy a 3D printer, go online and sign up with TinkerCAD. It is a free, browser-based Computer Aided Design (CAD) program with interactive tutorials. Take your time and go through all the tutorials. When you’re ready to build your first part, create a simple design in TinkerCAD. Within TinkerCAD you will use a variety of built in standard geometric shapes, sizing, shaping, and combining them to achieve the finished object you wish to print. At this point you have spent $0, but you will have learned the first step in the 3D printing process.
As you work in TinkerCAD, the exact dimensions of the project you are building are simulated so you can see how it will look like when printed in 3D.
STEP 2 – Convert the CAD File
When your project has been created in TinkerCAD and you are satisfied with the results, the next step is to save the file in a format that can be read by a 3D printer. One of the most common file formats used is the STL (Stereo Lithography Language) format. STL files contain the underlying geometry that various CAD systems can interpret. Other file formats are often used, but STL is the most common file format.
Step 3 – Manipulate the STL File
After your STL file is created and ready to be sent to the 3D printer, you will set the orientation and size for the object to be printed.
Step 4 – Prepare the 3D Printer
When your digital file is ready to be printed, all the materials you need must also be ready to start the printing process. You will need the appropriate FDM filament for your project if you are using a filament printer, or a suitable resin if you are going to use a resin printer.
Once your STL file is ready to go, it must be processed by slicing software that aids in the 3D printing process. It does this by converting the object into layers and provides the instructions that will be used by the 3D printer.
Most printers come with their own slicing software which can be loaded onto your PC or MAC. One common slicer used with resin printers is Chitubox. That’s a strange name but it works very well. With the slicer software you can re-size the object, re-orient it, clone it, etc. For small objects you can print as many of them as will fit on your build platform at one time, and it takes no longer to print multiples than it does to print one.
Step 5 – Print the Project
When everything is ready, it’s time to print your project! Some printers may take a while to create the final product. The printing time depends on how complex the project is, and how much detail is required in the part. Newer, more expensive printers will print faster.
When the printing process begins, thin layers of material accumulate and start shaping the project. The thickness of a typical layer is about 100 micrometers. Layer thickness is adjustable so you can choose the best balance between print speed and fine resolution.
Step 6 – Process the Final Piece
When your project is ready, this must be handled very carefully. Putting on gloves to handle the printed item is recommended. If you printed using the filament printing process, carefully brush off any residual powder to clean up the piece.
3D printing can produce a new part start to finish within a few hours, compared to traditional processes of manufacturing, this is very convenient and shows much faster results.
What Can Be 3D Printed?
3D printing has revolutionized the way models and prototypes are being created for the model railroad industry. The concept of “rapid prototyping” (RP) allows the creation of new products within hours or a few days rather than weeks or months using traditional methods. With 3D printing, almost any object you can think of can be printed.
Where Can I Find O Scale Items to Make?
In the OGR 3D Project Catalog of course! There are several dozen categories there for printing 3D projects as small as a milk can to a model of the Cincinnati Union Terminal passenger station.
There are also model train items ready to be downloaded on sites such as Thingiverse and GrabCad, though typically they are intended for HO or G scale. So if you plan to use any of these files you will have to resize them for O Scale according to this Scale Conversion table.
SCALE CONVERSION PERCENTAGES
| FROM TO
|
#1 scale | O scale | S scale | OO scale | HO scale | TT scale | N scale | Z scale |
| #1 scale (1:32) | 150% | 200% | 238% | 272% | 375% | 500% | 688% | |
| O scale (1:48) | 67% | 133% | 158% | 181% | 250% | 333% | 458% | |
| S scale (1:64) | 50% | 75% | 119% | 136% | 188% | 250% | 344% | |
| OO scale (1:76) | 42% | 63% | 84% | 115% | 158% | 211% | 289% | |
| HO scale (1:87) | 37% | 55% | 73% | 87% | 138% | 184% | 253% | |
| TT scale (1:120) | 27% | 40% | 53% | 63% | 73% | 133% | 183% | |
| N scale (1:160) | 20% | 30% | 40% | 48% | 43% | 75% | 138% | |
| Z scale (1:220) | 15% | 22% | 29% | 35% | 40% | 55% | 73% |
All the projects in the OGR 3D Catalog are properly sized for O Scale.
Which 3D Printer Should I Buy?
Before buying any 3D printer, be sure to sign up with TinkerCAD. Once you’ve learned the basics of designing a part with TinkerCAD, you will be in a much better position to decide which 3D printer you want to purchase. You will also have a much easier transition to using to the software that comes with your printer and other available CAD programs.
HERE is a page of 3D printers, priced from $189 to almost $13,000. 3D printers in the $300 to $600 price range will work fine for making nicely detailed O scale items.
Don’t Have a 3D Printer?
If you don’t have a 3D Printer, and you’re not quite ready to buy one, you can still make your own 3D items! Shapeways offers an online 3D Printing Service that is fast and affordable. All you have to do is send them your .stl file and your parts will be delivered right to your door.
CLICK HERE to download this article in PDF format.